To login to your cPanel account, you can login via
https://yourdomain.com.au/cpanel (your actual domain) or;
via MyToolbox.
Your cPanel username and password would have been sent to you in the email when you signed up with us, subject titled “New AccountInformation“. If you have misplaced this email, please contact us and we are happy to resend you this email.
Before contacting usPlease make sure that you are officially listed as an authorised account holder on your account. We cannot provide login information to individuals who are not the account owner or designated as authorised users on the account.
If your email is hosted by a third provider and you want us to maintain your DNS records i.e Office 365, Hosted Exchange or Google Apps, you need to change the MX Records within cPanel. Here is how you do it.
First, login to your cPanel account using either of the methods outlined above.
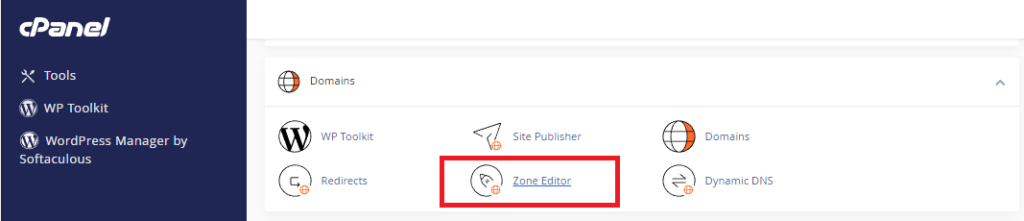
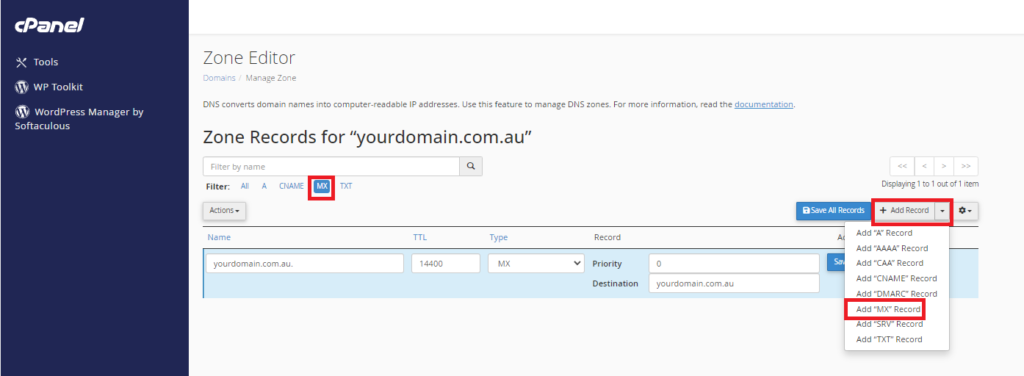
In cPanel scroll down to the section labelled Domains and select Zone Editor.
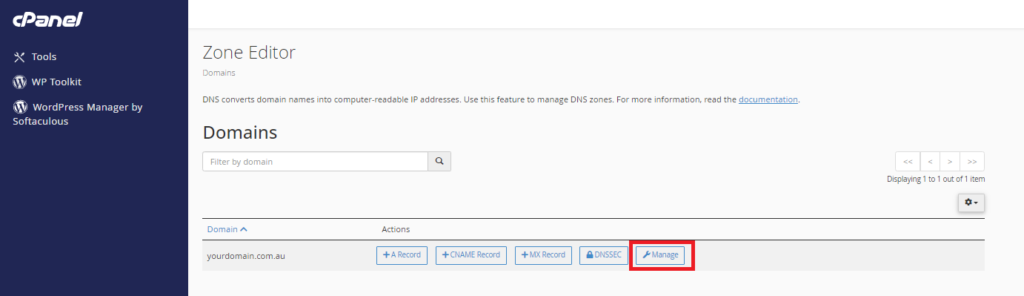
Find the domain name you want to update the MX Records for, and select Manage.
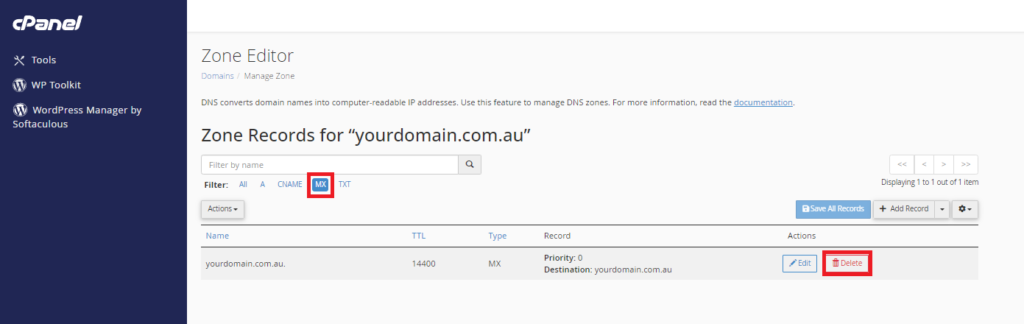
Then, under filter select MX, so that only the MX records are showing. Now delete the old MX records.
Please Note:Before you delete the records, you should make a copy of them somewhere, in case you ever have to restore the old records.
Now we can add the new records. To add a new MX record, click the arrow on the Add Record button, and then select Add “MX Record” from the dropdown menu.
Here you need to enter the MX Records that have been provided by your email hosting provider.
(Note: You shouldn’t need to change the name column, only the priority and destination)
Then click Add Record. Repeat until you have entered all the records your hosting provider sent you.
The MX records have been successfully updated.
If you host your website on the cPanel server and on your website you have a contact us form (or any other form), you will need to tell the webserver to push the message out to the external mail server (Office 365, Google Apps, Zoho etc…). If you don’t configure the following option correctly, the message will not be delivered.
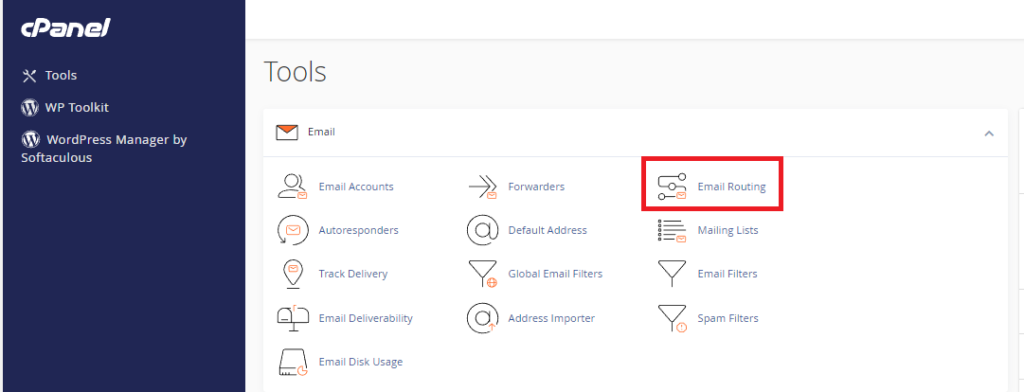
In order to make sure mail gets sent from the webserver correctly, we also need to update the Email Routing.
To do this, return to the home page in cPanel, and under Email, select Email Routing.
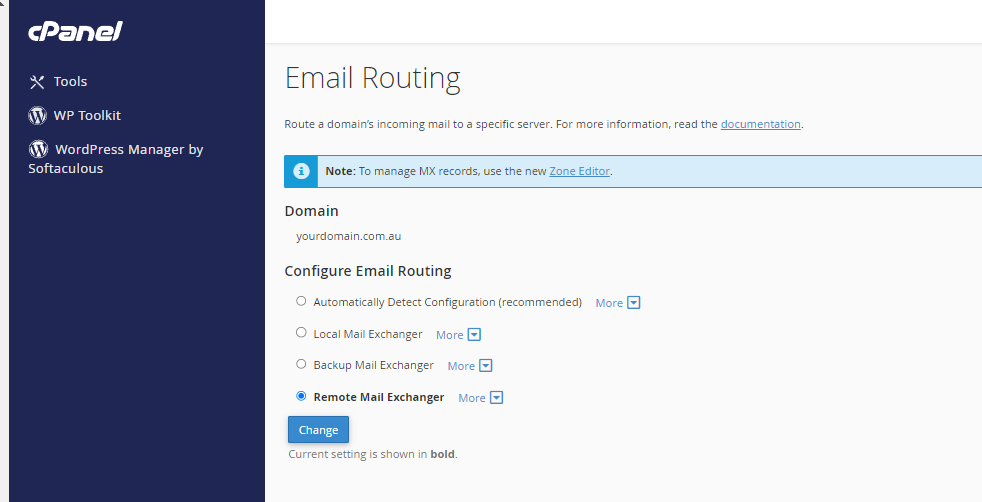
Select the option that says “Remote Mail Exchanger”, and then click the “Change” button.