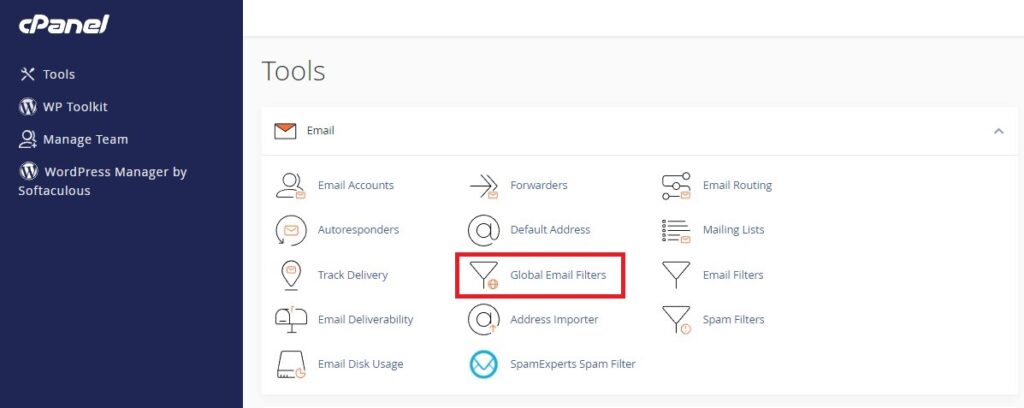
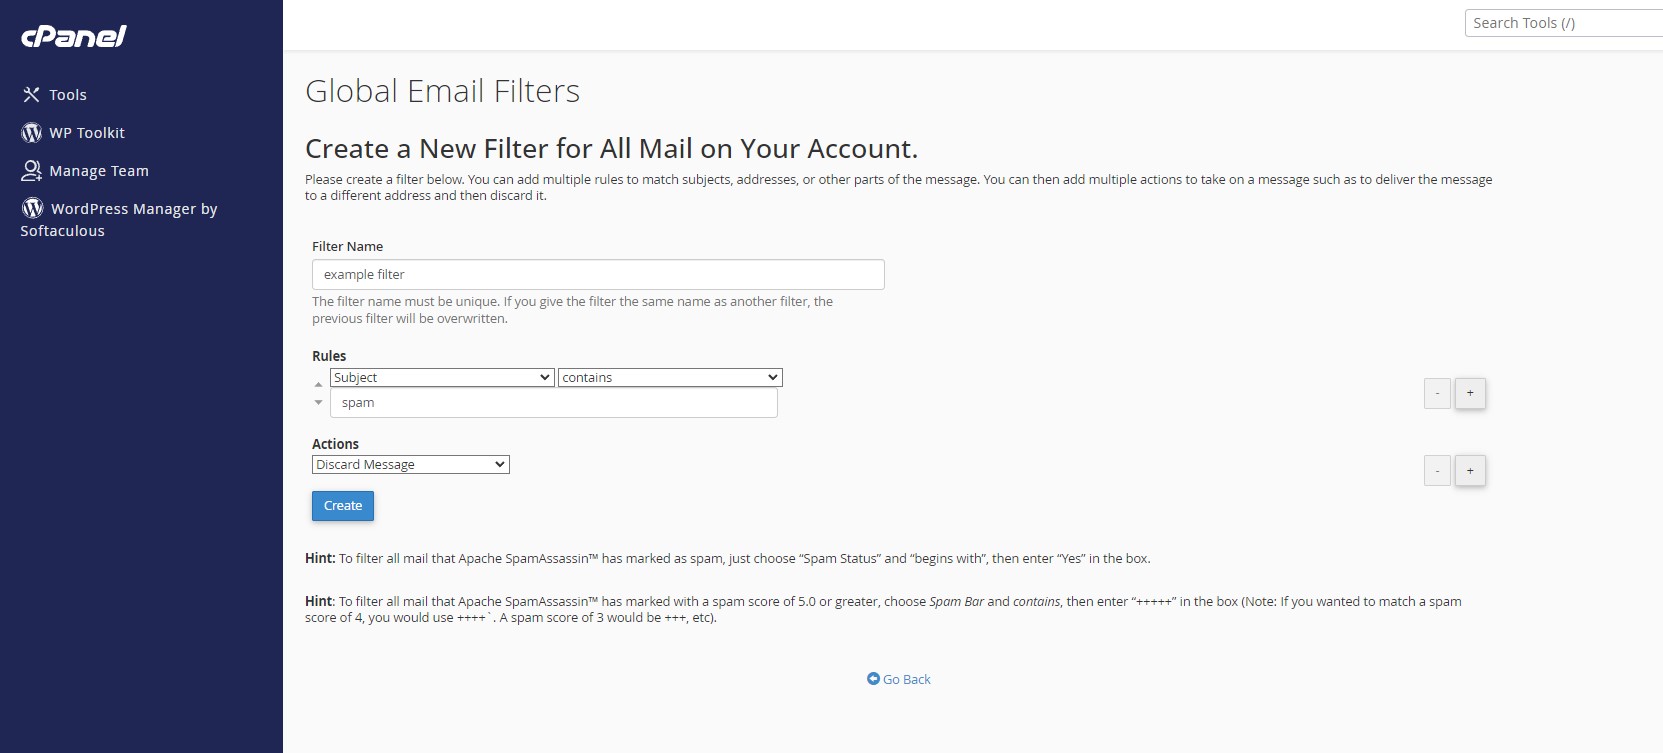
To create a new global filter perform the following steps:
1. Click create new filter
2. Enter a unique descriptive name for the filter
3. Set the rules and actions for your filter.
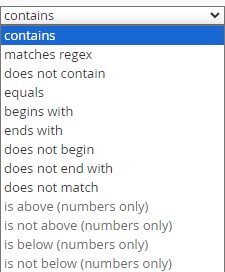
3.a. For your rules, you need to select a field, such as from address, to address, the subject, body, or header, as well as a corresponding result to look for. 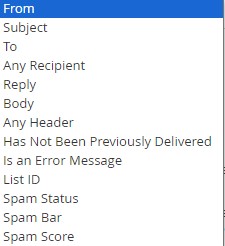
3.b. The second rule field determines how the result should appear. You can choose whether a field should contain a result, match a result exactly, end or begin with the result, or not include the result.
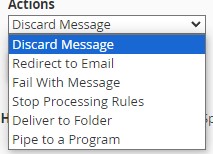
3.c. For the actions, you need to choose an action to occur when the rule is triggered.
You can add multiple rules or actions by clicking the + icon. For rules, you can specify "and" or "or".
This will determine whether the specified action requires one of the rules, or all of the rules to be fufilled.
In the example below, we have created a rule to discard any email, that contains the term spam in the subject
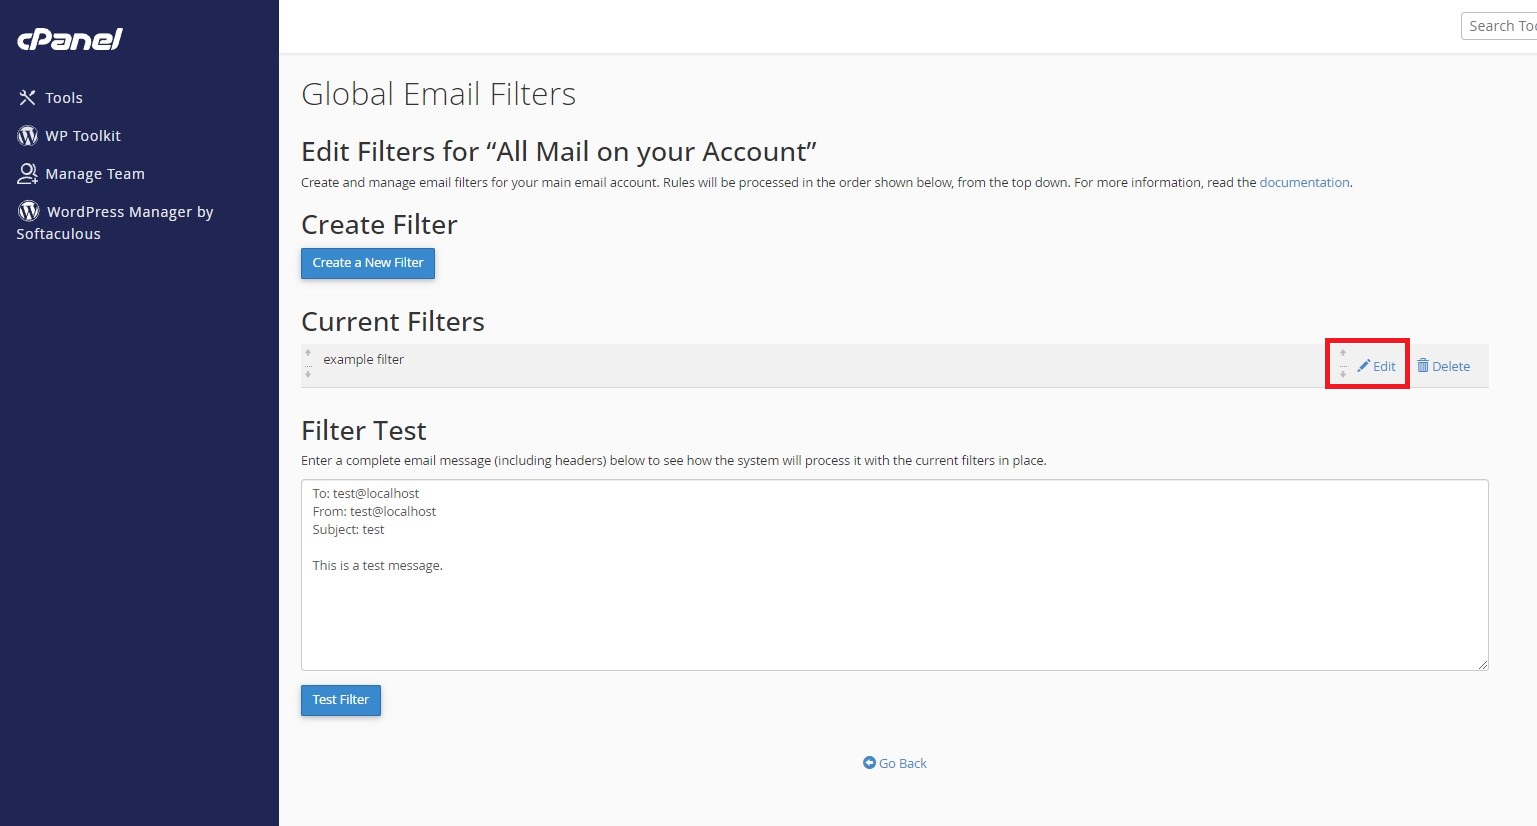
If you have at least one global filter created, the current filters section should appear on the main global filters page.
All of your current filters will be listed here.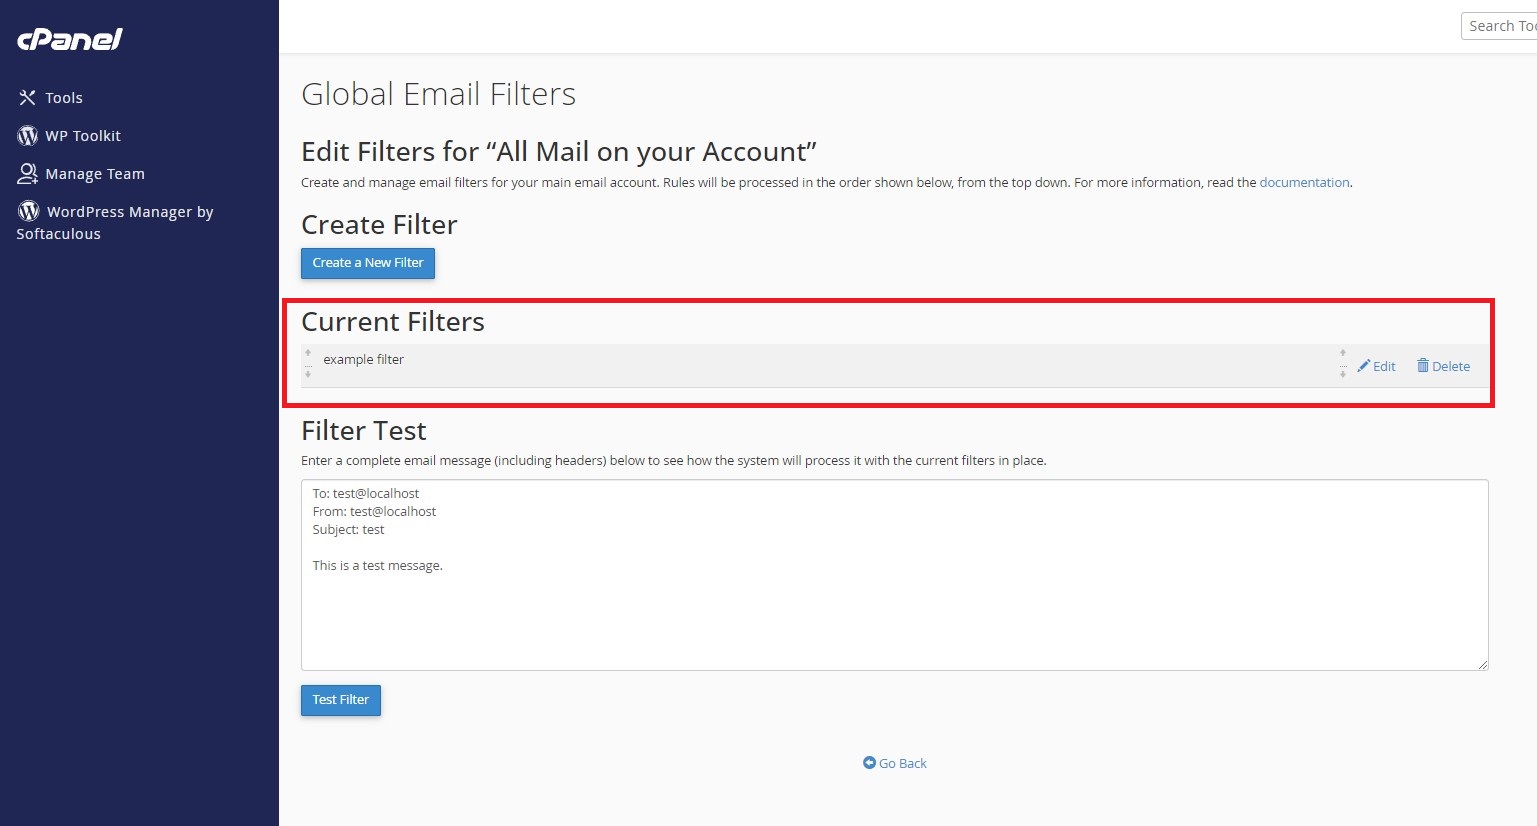
- To edit a current global filter, click the edit button next to that filter.
2. You should then be presented with a screen similar to the create a filter screen. Here you can modify the rules and actions.
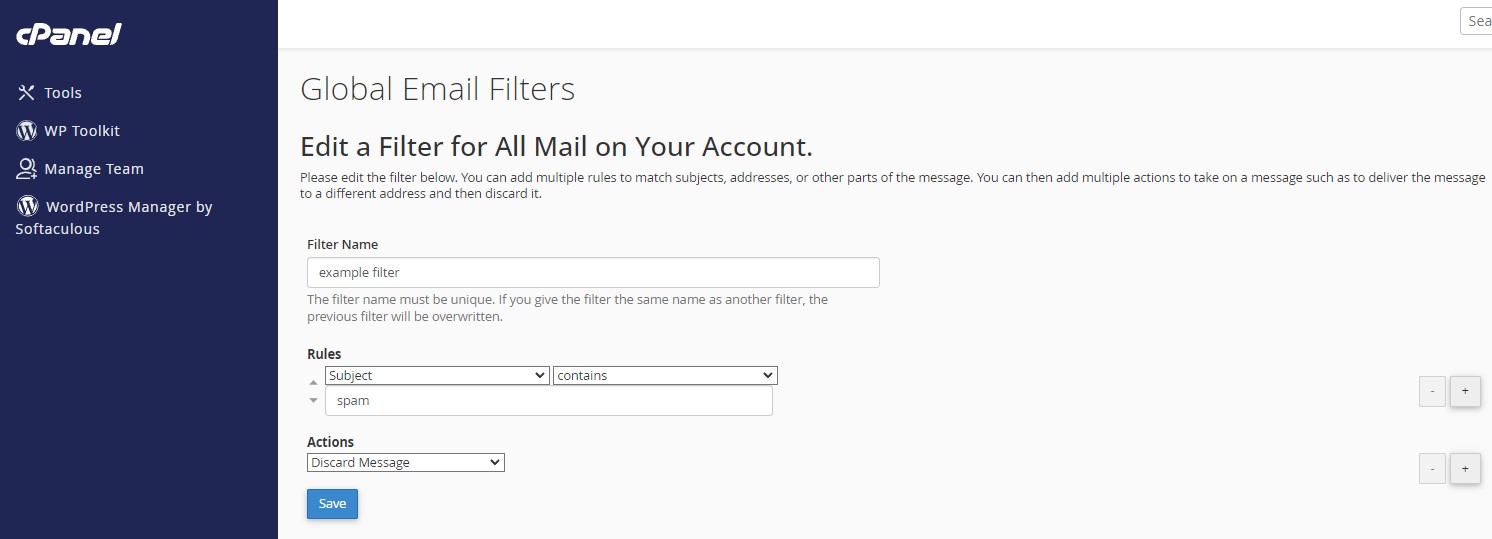
3. When you are done, click Save
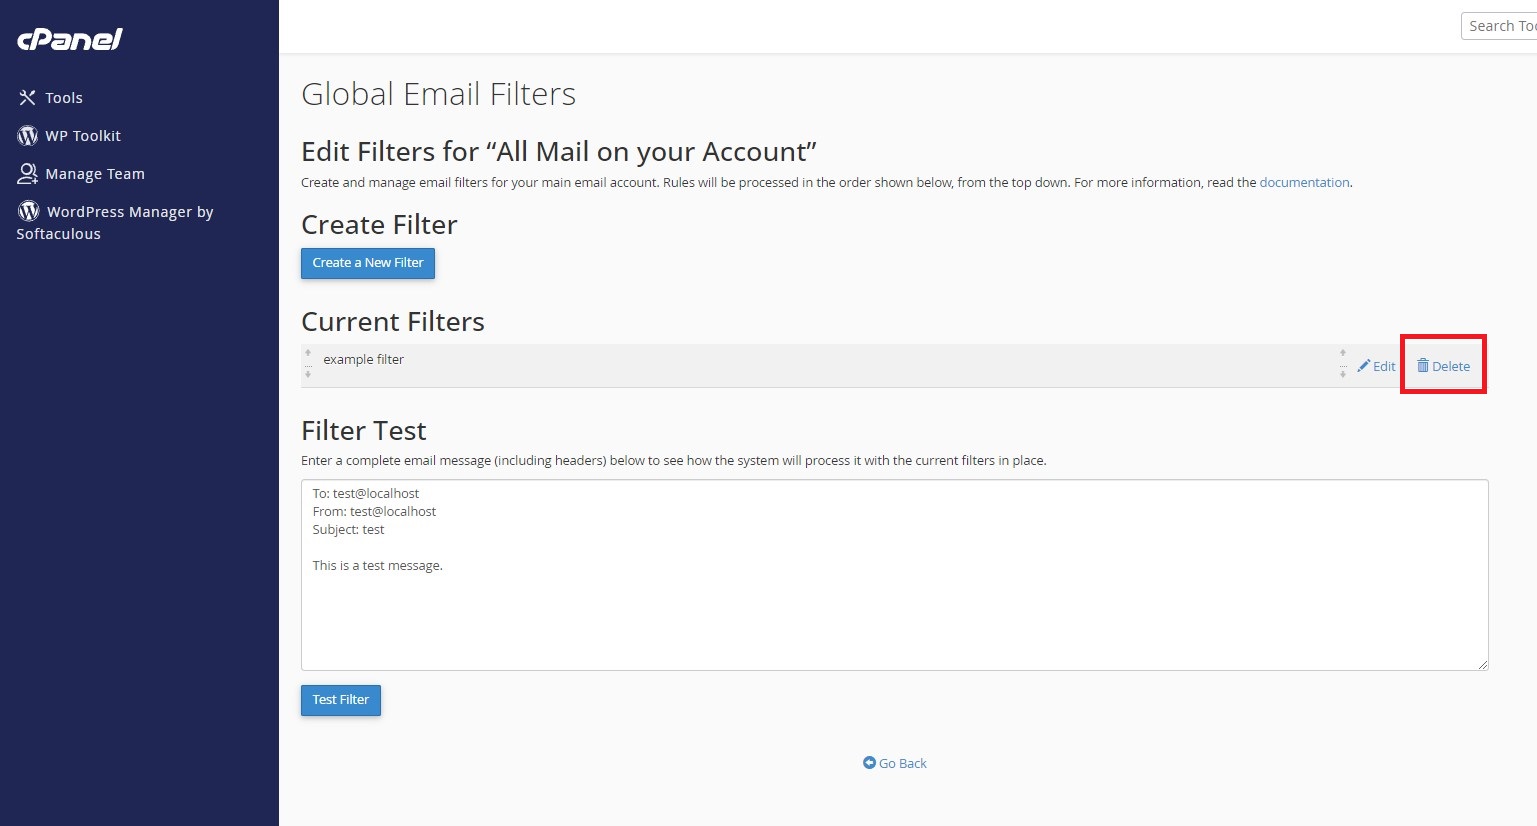
- To delete a filter, click the Delete button next to that filter.
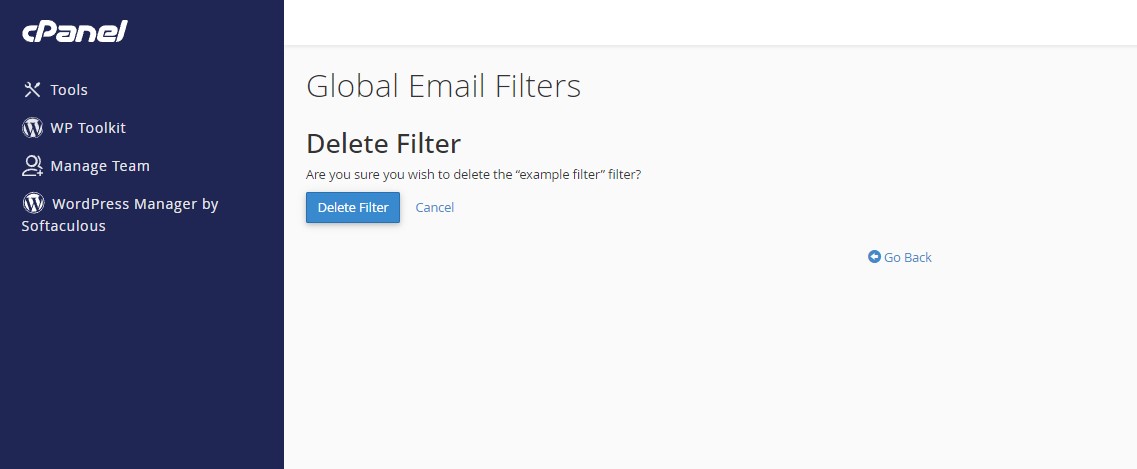
2. You should now be presented with an interface similar to the example below.
3. Click Delete Filter to confirm the deletion
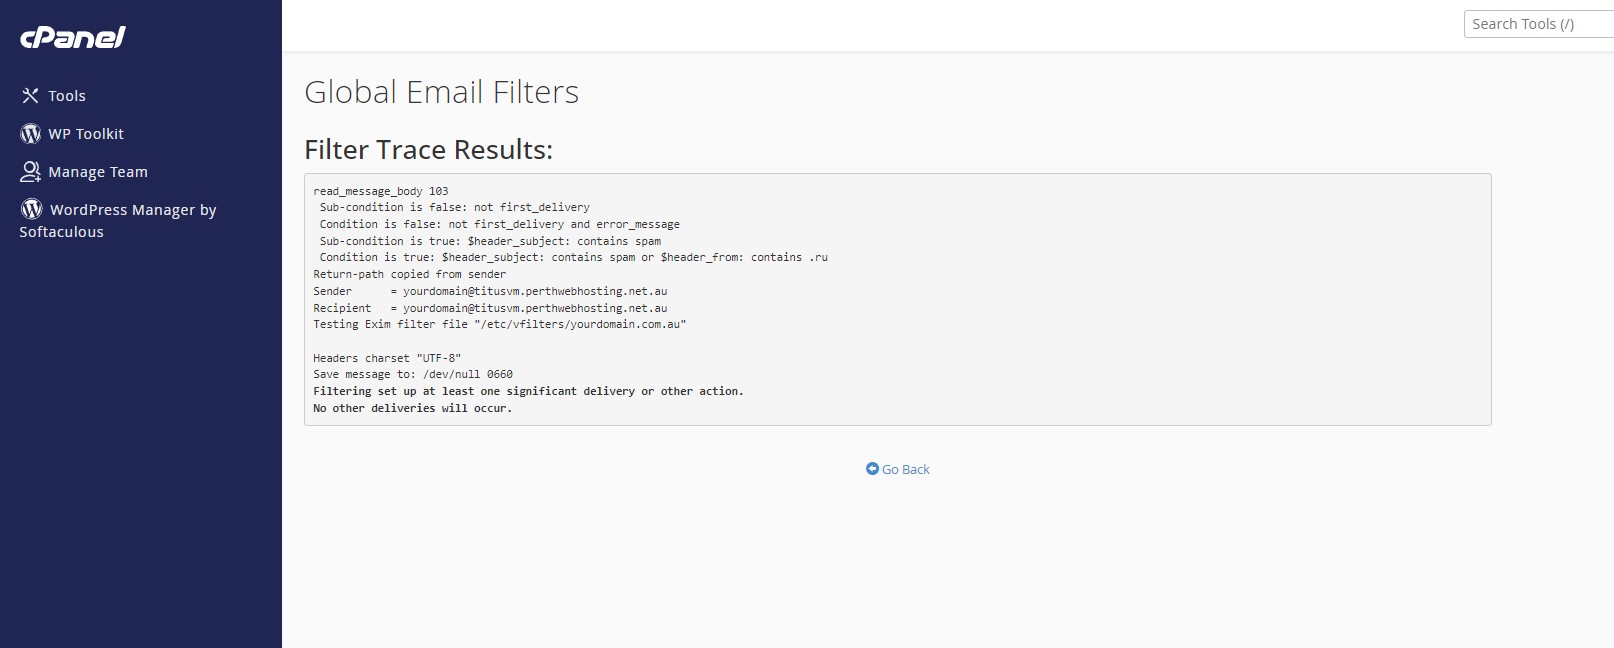
The test filter interface allows you to simulate how your filters will react to an email.
1. To test your filter, enter an email message into the filter test box.
2. Next to the headers, you can enter the relevant information and they will act appropriately. e.g. To simulate the email coming from a particular address, enter that address next to the "From:" field
In the example below, we are simulating an email that contains the word "spam" in the subject, and is from an email address ending in ".ru"
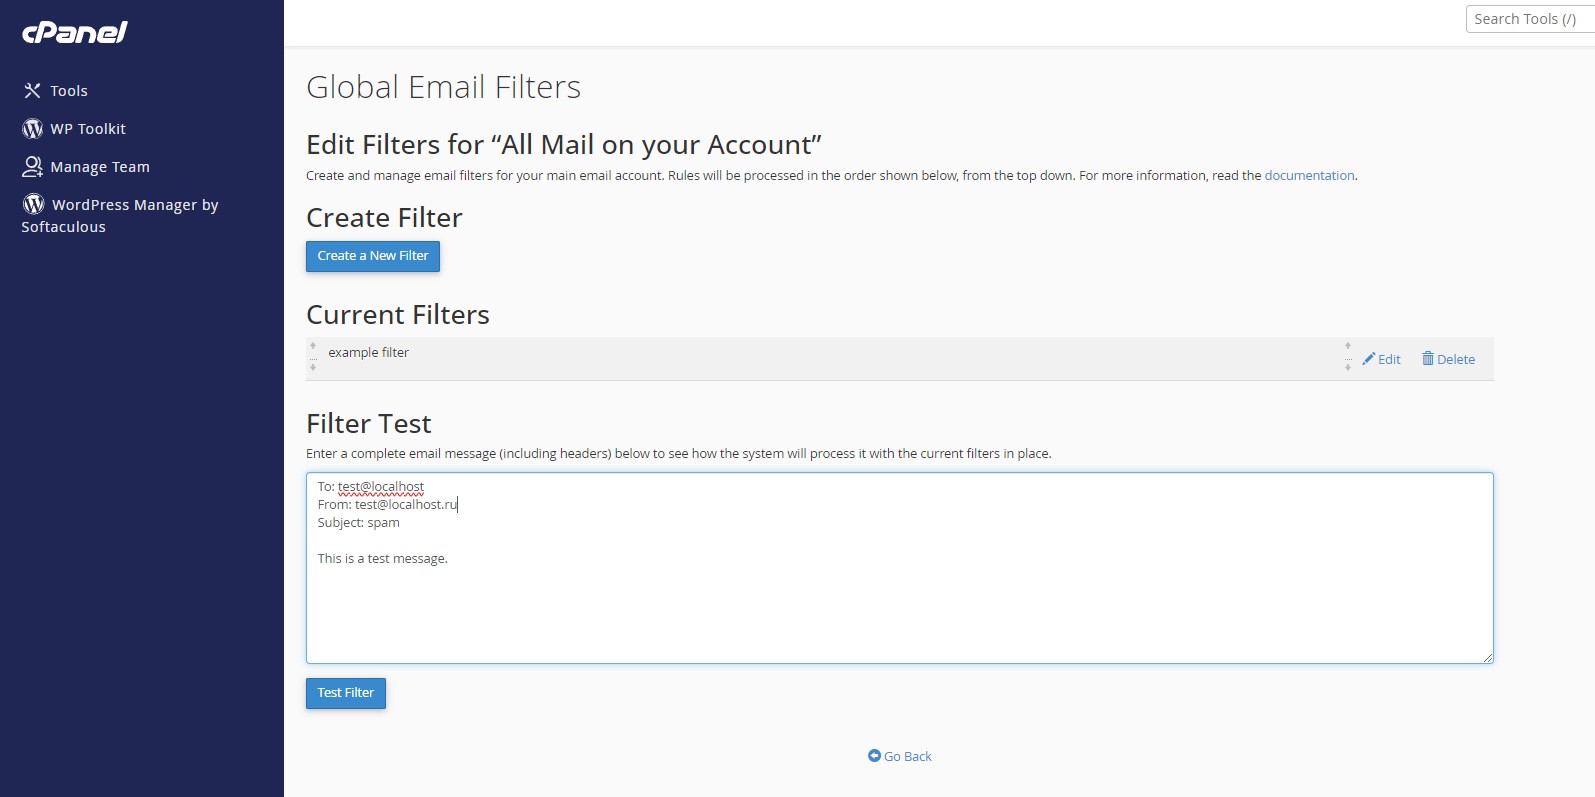
3. Click Test Filter.
4. You should now be presented with the results of the test.
Note the following line:
"Condition is true: $header_subject: contains spam or $header_from: contains .ru"
This indicates that the message has been flagged as triggering our filter rule and will be discarded.