Log into your cPanel using either of the methods outlined above.
Under the Files section in cPanel, select JetBackup 5.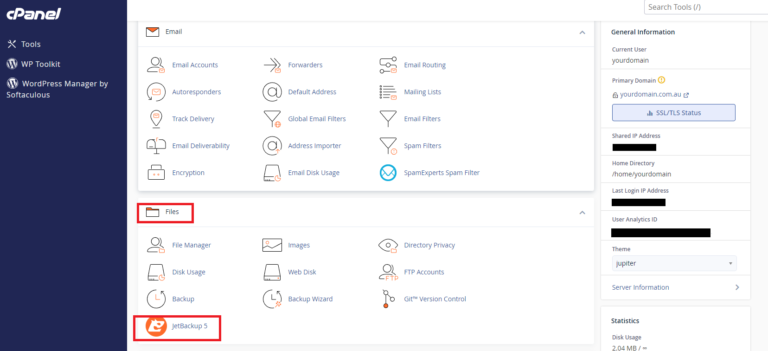
The JetBackup 5 Dashboard will be displayed showing your account information. Click on the Restore & Download icon on the left-hand side which is the 2 circular arrows.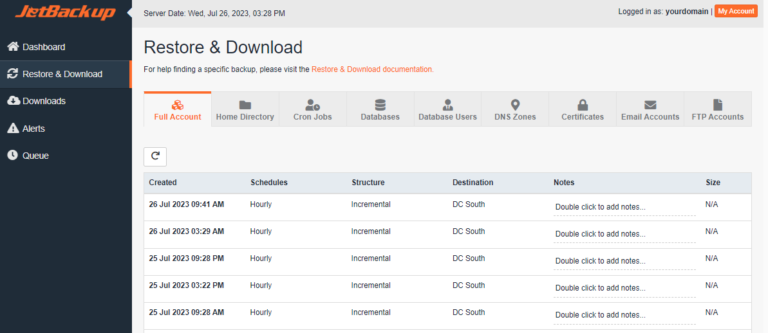
Select the date and time of the backup that you wish to restore from the drop-down list on the left of the Full Backup table. Click on Restore to run a restore on your account or Download to download the backup data as a file.
NOTE: Any backup files you restore will replace your existing data. Ensure you have a current backup before restoring any files. You can click on Download to download the file/s and verify them before you perform a restore which is advisable in case you overwrite files you do not intend to or overwrite recent updates made to your site.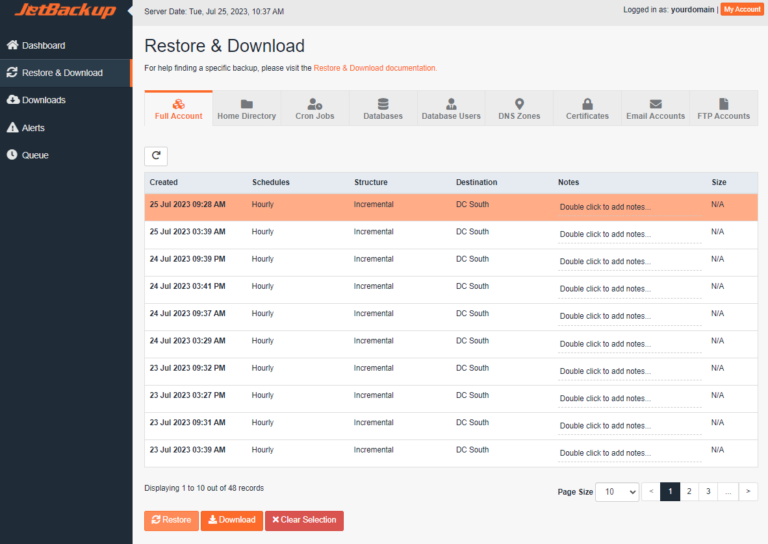
The data to be restored will be displayed under Items To Restore. You should leave the Merge backup data with live account data deselected otherwise the restoration may not work.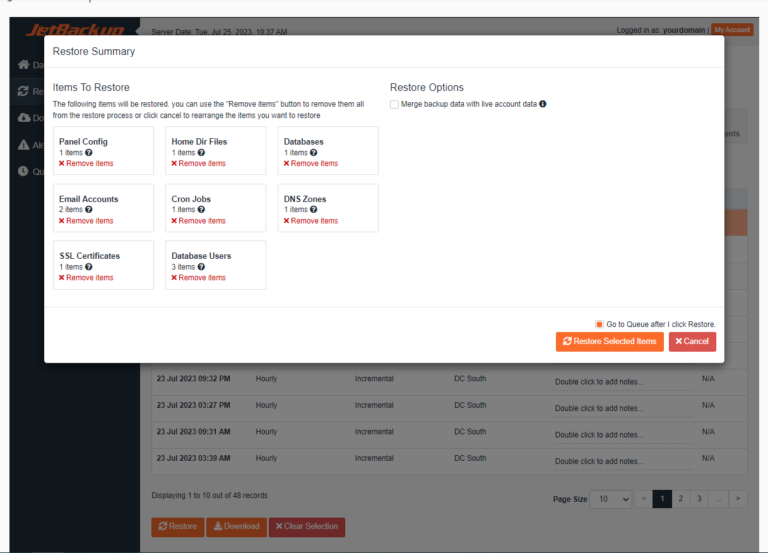
Once the restore process finishes your account data will be back online.